En este tutorial vamos a ver cómo podemos agregar banners con las siguientes particularidades:
- Imagen
- Título
- Descripción
- Texto del botón
- Link
- Alineación
Para el theme Base creamos un componente único para los banners que dependiendo donde lo utilizamos, lo mostramos de diferentes formas, como por ejemplo en los Banners de categorías y en los módulos de Imagen y texto.
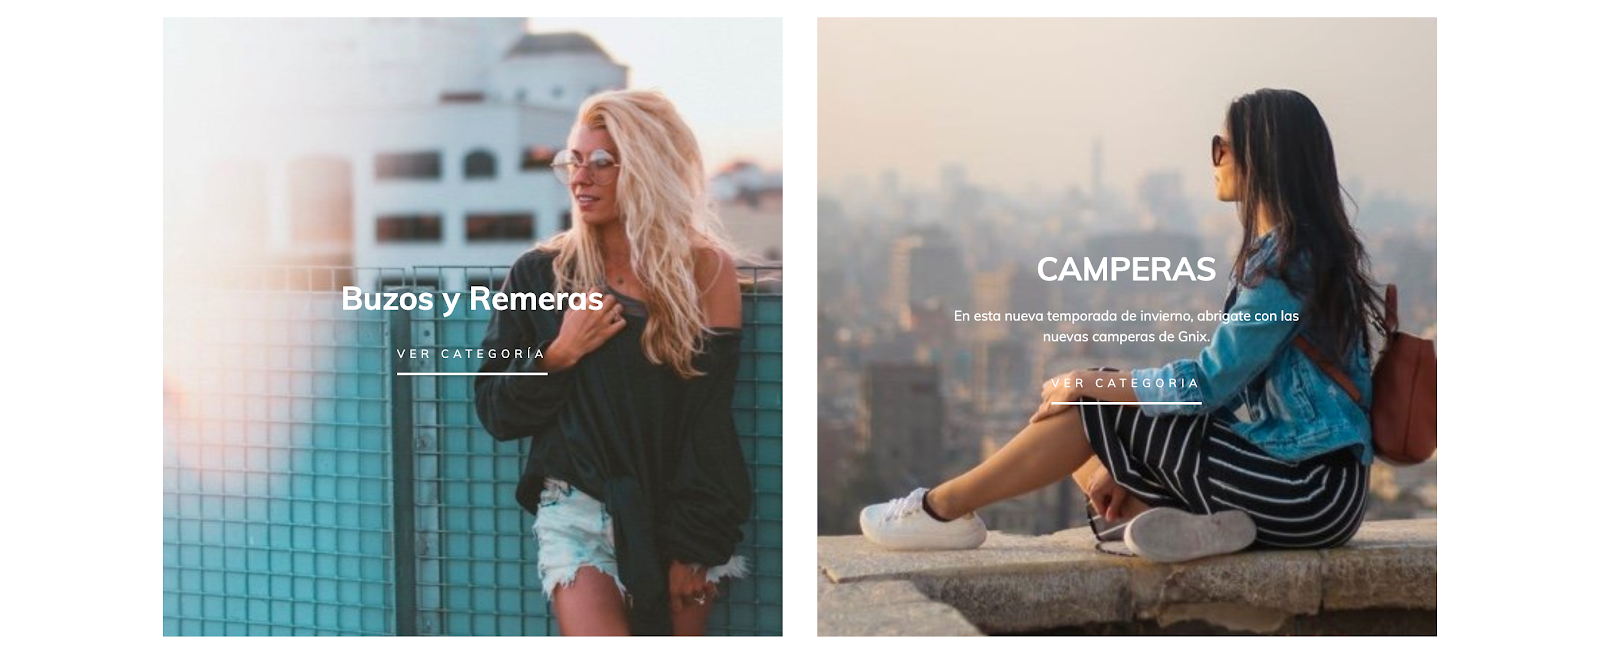
En este tutorial vamos a tomar el ejemplo de los banners para categorías, donde vamos a tener 3 banners con todos los elementos que listamos arriba, en una misma fila dentro del contenido de la página de inicio. Y va a tener una opción general, para configurar el componente al 100% de la pantalla, mostrando los banners sin márgenes laterales.
HTML
1. Lo primero que vamos a hacer es crear las carpeta home dentro de la carpeta snipplets, y luego agregar el snipplet home-banners.tpl con el siguiente código:
<section class="section-banners-home">
    <div class="container{% if settings.banners_full %}-fluid p-0{% endif %}">
        <div class="row {% if settings.banners_full %}no-gutters{% endif %} align-items-center">
            {% set num_banners = 0 %}
            {% for banner in ['banner_01', 'banner_02', 'banner_03'] %}
                {% set banner_show = attribute(settings,"#{banner}_show") %}
                {% set banner_title = attribute(settings,"#{banner}_title") %}
                {% set banner_button_text = attribute(settings,"#{banner}_button") %}
                {% set has_banner =  banner_show and (banner_title or banner_description or "#{banner}.jpg" | has_custom_image) %}
                {% if has_banner %}
                    {% set num_banners = num_banners + 1 %}
                {% endif %}
            {% endfor %}

            {% for banner in ['banner_01', 'banner_02', 'banner_03'] %}
                {% set banner_show = attribute(settings,"#{banner}_show") %}
                {% set banner_title = attribute(settings,"#{banner}_title") %}
                {% set banner_description = attribute(settings,"#{banner}_description") %}
                {% set banner_button_text = attribute(settings,"#{banner}_button") %}
                {% set banner_url = attribute(settings,"#{banner}_url") %}
                {% set has_banner =  banner_show and (banner_title or banner_description or "#{banner}.jpg" | has_custom_image) %}
                {% set has_banner_text =  banner_title or banner_description or banner_button_text %}
                {% if has_banner %}
                    <div class="col-md">
                        <div class="textbanner">
                            {% if banner_url %}
                                <a class="textbanner-link" href="{{ banner_url }}"{% if banner_title %} title="{{ banner_title }}" aria-label="{{ banner_title }}"{% else %} title="{{ 'Banner de' | translate }} {{ store.name }}" aria-label="{{ 'Banner de' | translate }} {{ store.name }}"{% endif %}>
                            {% endif %}
                            {% if store.thumbnails_enabled %}
                                <div class="textbanner-image{% if has_banner_text and textoverimage %} overlay{% endif %} lazyautosizes lazyload blur-up"{% if "#{banner}.jpg" | has_custom_image %} data-bgset='{{ "#{banner}.jpg" | static_url | settings_image_url('large') }} 480w, {{ "#{banner}.jpg" | static_url | settings_image_url('huge') }} 640w' data-sizes="auto" style="background-image: url({{ "#{banner}.jpg" | static_url | settings_image_url('tiny') }});"{% endif %}>
                            {% else %}
                                <div class="textbanner-image{% if has_banner_text and textoverimage %} overlay{% endif %} lazyload blur-up"{% if "#{banner}.jpg" | has_custom_image %} data-bg='{{ "#{banner}.jpg" | static_url }}' style="background-image: url({{ "#{banner}.jpg" | static_url | settings_image_url('tiny') }});" {% endif %}>
                            {% endif %}
                            </div>
                            <div class="textbanner-text{% if textoverimage %} over-image{% endif %}">
                                {% if banner_title %}
                                    <div class="h1 textbanner-title">{{ banner_title }}</div>
                                {% endif %}
                                {% if banner_description %}
                                    <div class="textbanner-paragraph">{{ banner_description }}</div>
                                {% endif %}
                                {% if banner_url and banner_button_text %}
                                    <button class="btn btn-line btn-small">{{ banner_button_text }}</button>
                                {% endif %}
                            </div>
                            {% if banner_url %}
                                </a>
                            {% endif %}
                        </div>
                    </div>
                {% endif %}
            {% endfor %}
        </div>
    </div>
</section>
Donde creamos un loop para construir uno por uno los banners, dependiendo de la información con la que cuente cada uno. En el caso de crear otros con diferente nombre (en este ejemplo se llaman: banner_01, banner_02 y banner_03), podemos modificarlos desde el for que los define:
{% for banner in ['banner_01', 'banner_02', 'banner_03'] %}2. Y luego necesitamos llamar al snipplet de los banners en el template templates/home.tpl, en la ubicación que prefieras dentro de tu diseño.
{% include 'snipplets/home/home-banners.tpl' %}CSS
Requisito:
Tener agregados en tu diseño las clases helpers. Podés seguir este este pequeño tutorial para hacerlo (simplemente es copiar y pegar algunas clases, no toma más de 1 minuto).
1. Agregar los estilos dentro del archivo static/style-critical.tpl
Si en tu diseño usas una hoja de estilos para el CSS crítico, vamos a necesitar el siguiente código dentro de la misma, pero si no es el caso entonces podés unificar el CSS de los pasos 1 y 2 en un solo archivo.
{# /* // Home banners */ #}

.textbanner {
  position: relative;
  margin-bottom: 20px;
  overflow: hidden;
}
.textbanner-link {
  display: block;
  width: 100%;
  height: 100%;
}
.textbanner-image {
  position: relative;
  padding-top: 100%;
  background-position: center;
  background-repeat: no-repeat;
  background-size: cover;
}
.textbanner-text {
  position: relative;
  padding: 0 5% 45px 5%;
  text-align: center;
}
.textbanner-text.over-image {
  position: absolute;
  top: 50%;
  left: 50%;
  z-index: 9;
  width: 100%;
  color: #fff;
  transform: translate(-50%, -50%);
}
.textbanner-title {
  margin-bottom: 15px;
  line-height: 34px;
}
.textbanner-paragraph {
  display: -webkit-box;
  margin-bottom: 15px;
  line-height: 18px;
  overflow: hidden;
  text-overflow: ellipsis;
  -webkit-line-clamp: 3;
  -webkit-box-orient: vertical;
}


{# /* // Min width 768px */ #}

@media (min-width: 768px) {

  {# /* //// Banners */ #}

  {# /* Home Banners */ #}

  .textbanner-text {
    padding: 30px 20%;
  }
}
2. Agregar los estilos dentro del archivo static/style-async.tpl
Si en tu diseño usas una hoja de estilos para CSS asíncrono, vamos a necesitar el siguiente código dentro de la misma, si no podés unificarlo con el paso anterior.
{# /* // Mixins */ #}


{# This mixin adds browser prefixes to a CSS property #}

@mixin prefix($property, $value, $prefixes: ()) {
  @each $prefix in $prefixes {
    #{'-' + $prefix + '-' + $property}: $value;
  }
  #{$property}: $value;
}

{# /* // Banners */ #}


.textbanner {
  .textbanner-image.overlay {
    @include prefix(transition, all 0.8s ease, webkit ms moz o);
  }
  &:hover .textbanner-image.overlay,
  &:focus .textbanner-image.overlay {
    @include prefix(transform, scale(1.03), webkit ms moz o);
  }
}
3. Agregamos el siguiente SASS de colores en style-colors.scss.tpl (o la hoja de tu diseño que tenga los colores y tipografías de la tienda). Recordá que las variables de colores y tipografías pueden variar respecto a tu diseño:
{# This mixin adds browser prefixes to a CSS property #}


@mixin prefix($property, $value, $prefixes: ()) {
    @each $prefix in $prefixes {
        #{'-' + $prefix + '-' + $property}: $value;
    }
       #{$property}: $value;
}


{# /* // Buttons */ #}


.btn{
  text-decoration: none;
  text-align: center;
  border: 0;
  cursor: pointer;
  -webkit-appearance: none;
  -moz-appearance: none;
  appearance: none;
  text-transform: uppercase;
  background: none;
  @include prefix(transition, all 0.4s ease, webkit ms moz o);
  &:hover,
  &:focus{
    outline: 0;
    opacity: 0.8;
  }
  &[disabled],
  &[disabled]:hover{
    opacity: 0.5;
    cursor: not-allowed;
    outline: 0;
  }
  &-default{
    padding: 10px 15px;
    background-color: rgba($main-foreground, .2);
    color: $main-foreground;
    fill: $main-foreground;
    font-weight: bold;
  }
  &-block{
    float: left;
    width: 100%;
  }
  &-small{
    display: inline-block;
    padding: 10px;
    font-size: 10px;
    letter-spacing: 2px;
  }
  &-line{
    padding: 10px 0;
    color: $main-background;
    fill: $main-background;
    letter-spacing: 4px;
    border-bottom: 2px solid;
  }
}
JS
Como en este tutorial usamos la técnica de lazy load con el plugin Lazysizes, necesitamos agregarlo. Para ver como hacerlo podés leer este corto artículo y luego continuar con este tutorial.
Configuraciones
En el archivo config/settings.txt vamos a agregar todos los campos para los 3 banners con sus características. Los vamos a agregar dentro de la sección Pagina de inicio.
collapse
        title = Banners de categorías
    description
        description = Los banners se mostrarán de izquierda a derecha en computadoras y de arriba hacia abajo en celulares
    checkbox
        name = banners_full
        description = Mostrar banner a todo el ancho de la pantalla en computadoras
    subtitle
        subtitle = CATEGORÍA 1
    checkbox
        name = banner_01_show
        description = Mostrar banner
    image
        original = banner_01.jpg
        title = Cargar imagen (JPG, GIF, PNG)
        width = 600
        height = 600
    i18n_input
        name = banner_01_title
        description = Título
    i18n_input
        name = banner_01_description
        description = Descripción
    i18n_input
        name = banner_01_button
        description = Texto del botón
    i18n_input
        name = banner_01_url
        description = Link
    dropdown
name = banner_01_align
description = Alineación del texto
values
                left = Izquierda
                center = Centrado
                   right = Derecha


    subtitle
        subtitle = CATEGORÍA 2
    checkbox
        name = banner_02_show
        description = Mostrar banner
    image
        original = banner_02.jpg
        title = Cargar imagen (JPG, GIF, PNG)
        width = 600
        height = 600
    i18n_input
        name = banner_02_title
        description = Título
    i18n_input
        name = banner_02_description
        description = Descripción
    i18n_input
        name = banner_02_button
        description = Texto del botón
    i18n_input
        name = banner_02_url
        description = Link
    dropdown
name = banner_02_align
description = Alineación del texto
values
                left = Izquierda
                center = Centrado
                   right = Derecha


    subtitle
        subtitle = CATEGORÍA 3
    checkbox
        name = banner_03_show
        description = Mostrar banner
    image
        original = banner_03.jpg
        title = Cargar imagen (JPG, GIF, PNG)
        width = 600
        height = 600
    i18n_input
        name = banner_03_title
        description = Título
    i18n_input
        name = banner_03_description
        description = Descripción
    i18n_input
        name = banner_03_button
        description = Texto del botón
    i18n_input
        name = banner_03_url
        description = Link
    dropdown
name = banner_03_align
description = Alineación del texto
values
                left = Izquierda
                center = Centrado
                   right = Derecha
Traducciones
En este paso agregamos los textos para las traducciones en el archivo config/translations.txt
es "Los banners se mostrarán de izquierda a derecha en computadoras y de arriba hacia abajo en celulares"
pt "Os banners serão exibidos da esquerda para a direita em computadores, e de cima para baixo em celulares."
en "Banners will be displayed from left to right on desktop and from top to bottom on mobile"

es "Banners de categorías"
pt "Banners de categorias"
en "Categories banners"
es_mx "Banners de categorías"


es "CATEGORÍA 1"
pt "CATEGORIA 1"
en "CATEGORY 1"
es_mx "CATEGORÍA 1"


es "CATEGORÍA 2"
pt "CATEGORIA 2"
en "CATEGORY 2"
es_mx "CATEGORÍA 2"


es "CATEGORÍA 3"
pt "CATEGORIA 3"
en "CATEGORY 3"
es_mx "CATEGORÍA 3"


es "Mostrar banner"
pt "Mostrar banner"
en "Show banner"
es_mx "Mostrar el banner"


es "Imagen de fondo"
pt "Imagem de fundo"
en "Background image"
es_mx "Imagen de fondo"


es "Cargar imagen (JPG, GIF, PNG)"
pt "Carregar imagem (JPG, GIF, PNG)"
en "Upload image (JPG, GIF, PNG)"
es_mx "Cargar imagen (JPG, GIF, PNG)"


es "Título"
pt "Título"
en "Title"
es_mx "Título"


es "Descripción"
pt "Descrição"
en "Description"
es_mx "Descripción"


es "Texto del botón"
pt "Texto do botão"
en "Button text"
es_mx "Texto del botón"


es "Link"
pt "Link"
en "Link"
es_mx "Link"


es "Alineación del texto"
pt "Alinhamento do texto"
en "Text align"
es_mx "Alineación del texto"


es "Izquierda"
pt "Esquerda"
en "Left"
es_mx "Izquierda"


es "Centrado"
pt "Centralizado"
en "Center"
es_mx "Centrado"


es "Derecha"
pt "Direita"
en "Right"
es "Derecha"
Activación
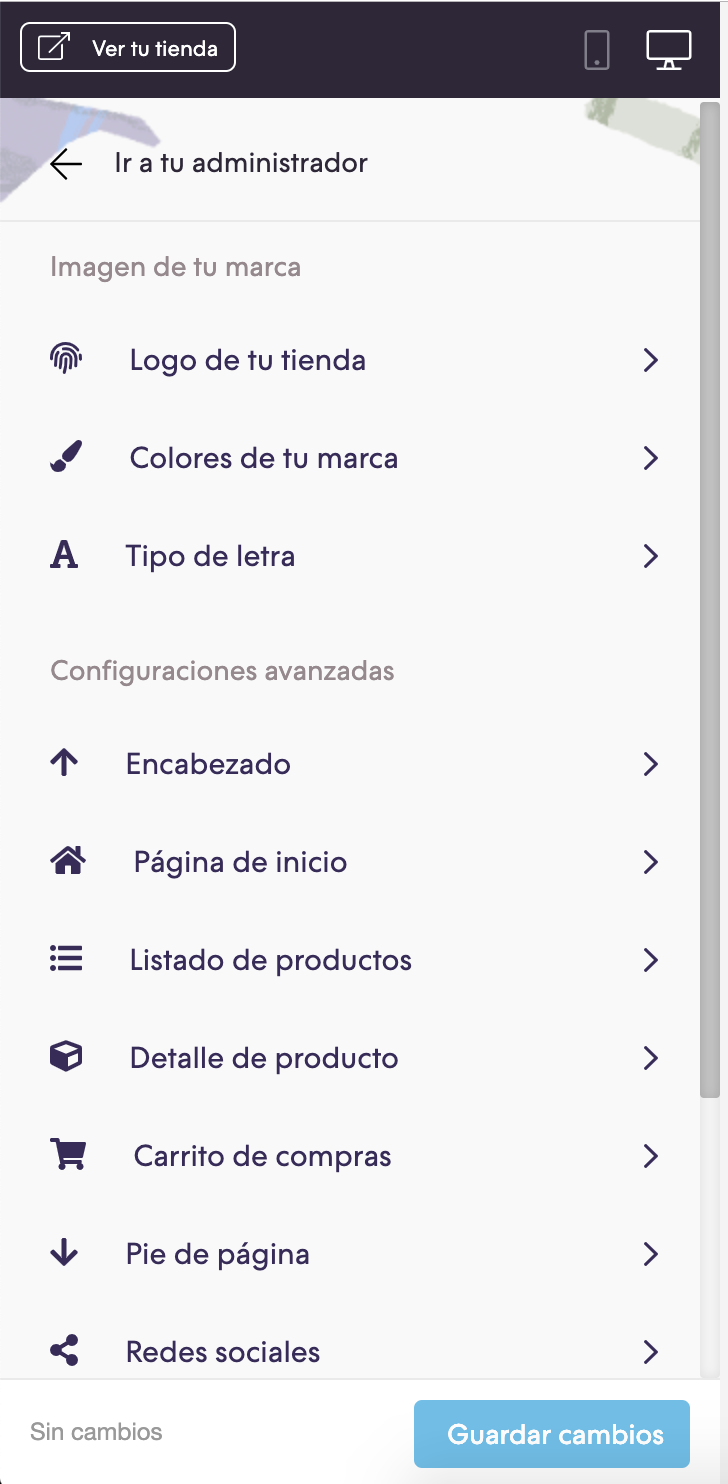
Por último podés activar el video desde el Administrador nube, en la sección de Personalizar tu diseño actual dentro de las Página de inicio: